

New Incident / Complaint
Contents
Registration
Customer and Sender
Receiver
Connection
Documentation
Text editor
Attachments
Review / Analysis
Solution
Corrective action task list
Follow-up
Access
Web submissions
Deleting incidents
When you are in the Incidents & Complaints interface and you want to register a new incident, you simply click the New document button.
![]()
A template for a new document appears with five tabs at the top of the interface. The tabs are Registration, Review/Analysis, Solution, Follow-up and Access. On the right-hand side of the page, you can see fields that are required before you can save and confirm the incident. When all necessary fields have been filled out the incident is saved (without closing) by clicking Save and then you hit Close to close it.
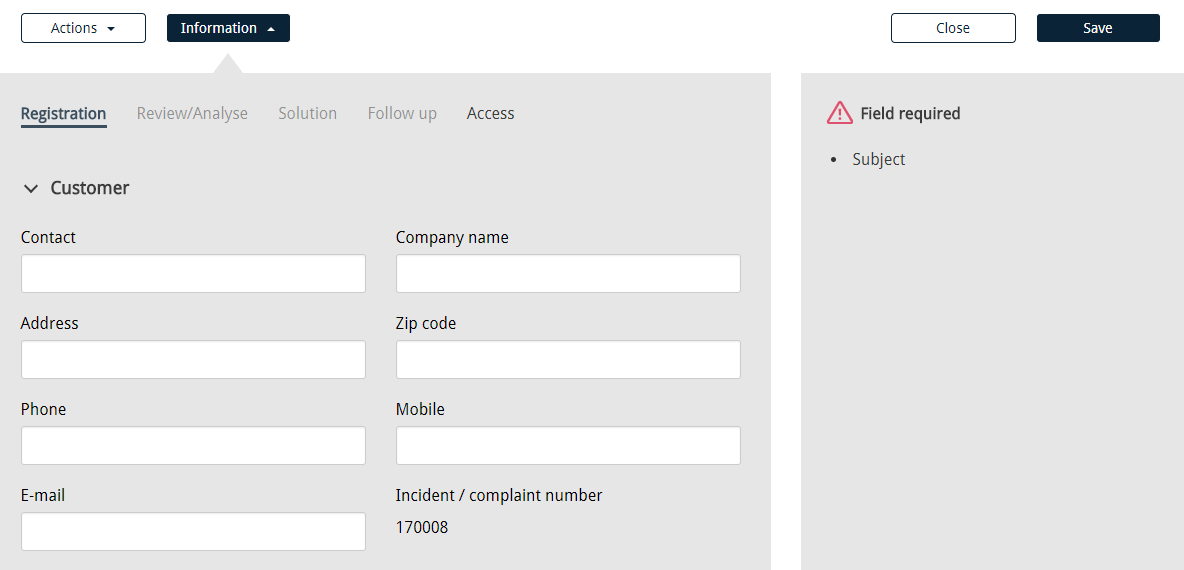
Registration
In the registration tab, the basic information of the incident or complaint is registered. Here you can specify the contact info of both the person involved, and the one who reported the incident (if different from the person involved). Then you try to categorize the incident to the best of your ability. It‘s possible to link the incident to quality documents and risk assessments if necessary. Employees should strive to be conscientious when it comes to this part and provide as much information as possible in the registration. Detailed registration information results in easier processing and more efficient response to the incident.
Please note, however, that there is no field required in the registration tab, except the subject of the incident. The subject is basically the heading or title of the incident and appears in the overview. Therefore, it must be as descriptive of the incident as possible. The content of the incident can then be described in detail in the standard text editor below.
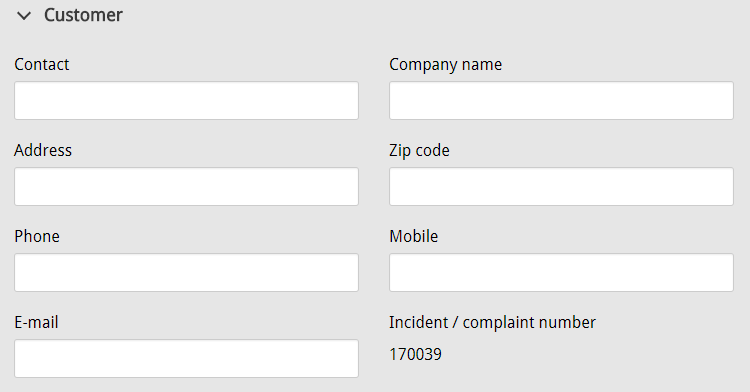
Customer and Sender
All information about the person (or customer) involved with the incident is listed in this section. You specify his name, address, email and phone number, and if it’s relevant to the case, you can state the name of the company the person works for.
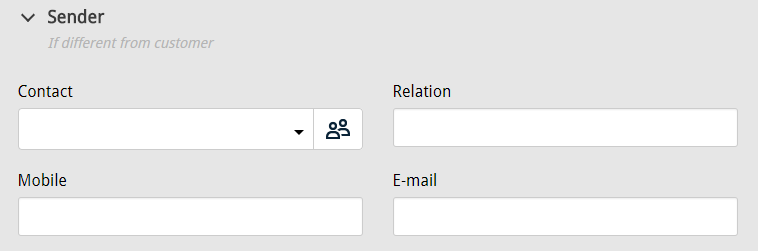
Directly below, you have the option of registering information about the person (or sender) who reported the incident, if different from the person involved. The sender’s name can either be entered directly in the input field or selected from a staff list (or address book) that appears when you click the ![]() icon. Email address and phone number should be specified and you also have the opportunity of describing the relation or connection of the sender to the customer.
icon. Email address and phone number should be specified and you also have the opportunity of describing the relation or connection of the sender to the customer.
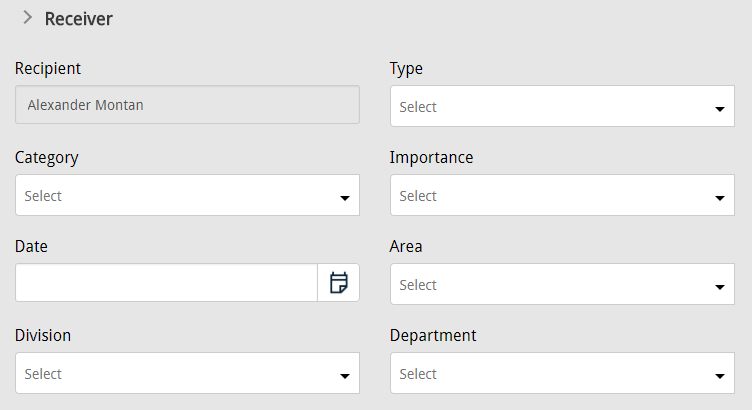
Receiver
You can categorize incidents in a variety of ways. When configuring the system settings, you define several categories for classifying incidents, along with different types of incidents and levels of importance. In addition, you can determine the divisions and departments they may belong to. When it eventually comes to categorizing incidents in the Receiver section, all of these predefined values appear in drop-down lists for you to choose from. If a custom category has been configured in the system, it also becomes available here – either as a drop-down list or as an input field. An input field is basically a blank textbox where you can enter information.
Categories of incidents should cover all operations performed in the company. A type of incident can for example be a complaint or a compliment, an internal or an external incident. An internal incident means that it comes from an individual within the company, while an external incident comes from an outsider. The importance of an incident is decided depending on the urgency and severity of it. You mark the date of the incident and if your company operates in more than one region, you can specify the area where it occurred.
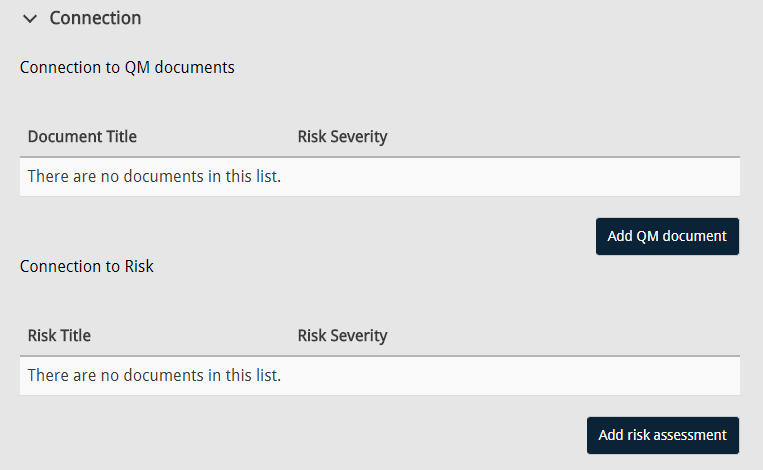
Connection
Incidents and complaints can be linked to published quality documents and/or risk assessments, as long as the company’s subscription includes the relevant CCQ modules. In other words, access to the Quality Manual and the Risk module is essential for this purpose. With these connections you can refer to appropriate procedures and preventive actions to reduce risk already identified for the company.
Documentation
When you are finished with the formalities and the incident has been properly registered and categorized, you have the option of minimizing the information field by clicking the Information button at the top of the page. What remains below is the heading or subject of the complaint and a standard text editor where you can describe the incident in full detail. The text editor allows you to write text, insert tables, etc. In addition, you have the ability to upload attachments to the incident.
Text editor
The inbuilt text editor comes with all the basic features. As expected, you are presented with a blank document where you can begin typing. You have a host of formatting options for setting the font size and style, controlling line spacing and indentation, etc. You can insert tables, pictures and video, and a nice feature allows you to get links to quality documents in the system.

By clicking the ![]() icon, you can put the text editor into full screen mode to see more of the document that you’re working with. This stretches the editor to the width and height of your browser window.
icon, you can put the text editor into full screen mode to see more of the document that you’re working with. This stretches the editor to the width and height of your browser window.
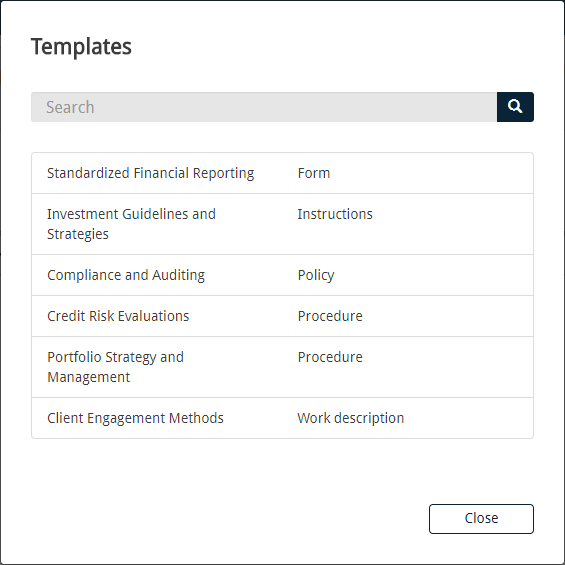
Another feature allows you to fetch predetermined templates for your incident. In the settings menu you can create different templates that you can use in the editor. This should facilitate the process of registering new incidents and establish a kind of consistency. This will be covered in more detail in chapter 4.3. To get a template for an incident you click the ![]() icon in the text editor. You get a list of the templates that you’ve already created in the settings menu, and then you select the appropriate one.
icon in the text editor. You get a list of the templates that you’ve already created in the settings menu, and then you select the appropriate one.
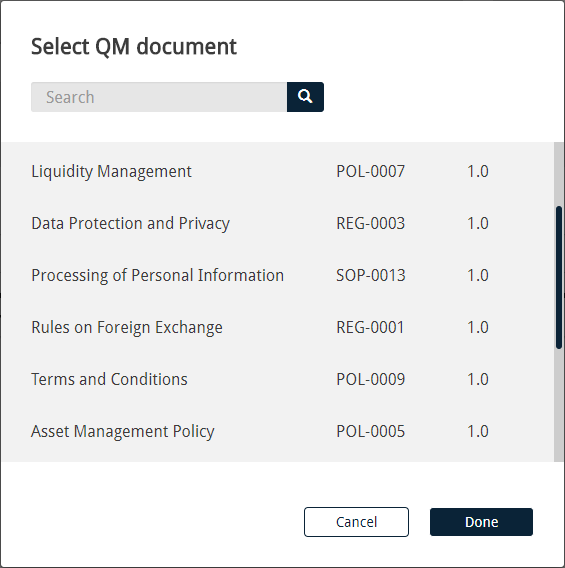
By clicking the ![]() icon, you will receive a list of published quality documents that you can search through and get links to, as long as your company is subscribed to the Quality Manual module.
icon, you will receive a list of published quality documents that you can search through and get links to, as long as your company is subscribed to the Quality Manual module.
Attachments
You can add as many attachments to an incident as you want. There are various types of files you can attach to an incident, ranging from simple text files to complex diagrams. To add an attachment you simply click New attachment, which opens a file explorer where you choose the file to add.
![]()
The selected file appears in a list at the bottom of the page which indicates that the file has been attached, but it isn’t uploaded to the system until the incident is saved. On the other hand, if the intention is to remove an attachment from an incident, you can do that by clicking the x behind the file.

It’s easy to download a file that has been uploaded to an incident, as you simply click on the filename itself.
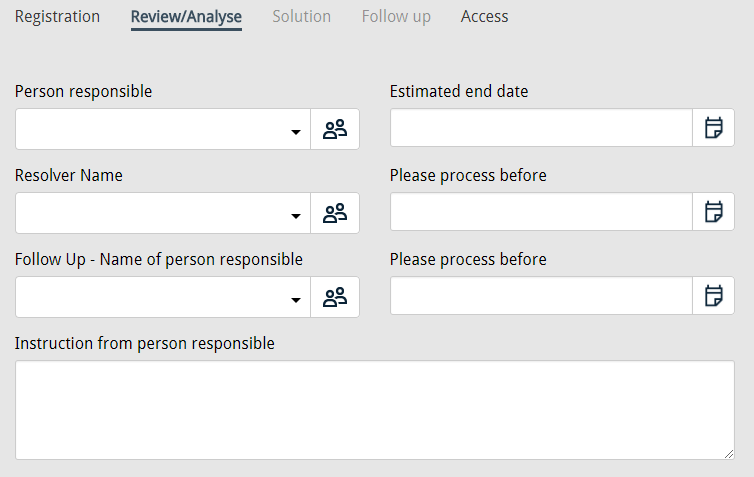
Review / Analysis
The Review / Analysis tab will not be activated until the registration of the incident is completed and saved. The person responsible for the incident is specified here, as well as those who are selected to manage the resolution and follow-up of the complaint. In system settings you have the opportunity to appoint a certain employee as the default person responsible. Thus, that employee is automatically registered as the person responsible for all new incidents. However, you can always change the person responsible by clicking the drop-down list or by selecting a different employee from the address book.
Once the incident has been carefully reviewed and analyzed, it’s up to the person responsible to decide how it should be processed and resolved. In this tab, he can leave instructions on how to resolve the issue, but he also has to estimate and set its end date – as well as deadlines for the resolution and follow-up of the incident. The person responsible receives an email when a new incident is registered in the system, and he’s also notified if the resolver or the individual tasked with the follow-up are replaced. It’s not mandatory to nominate someone to handle the follow-up, but to specify the resolver of the incident is conditional. When all required fields have been filled out, the review/analysis is confirmed by clicking a corresponding button and the next step in the procedure is activated.
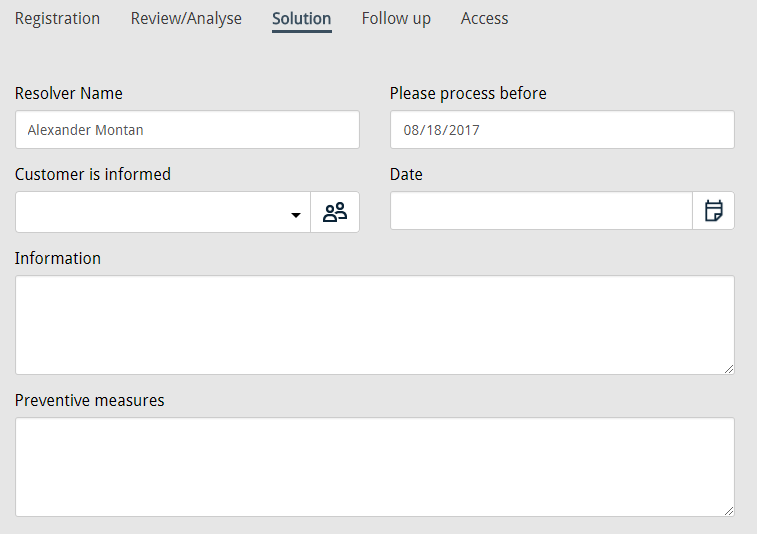
Solution
Once the review/analysis of an incident has been confirmed, the Solution tab is activated. Root cause analysis is often the key to resolving incidents. It’s a useful method for understanding and solving a problem – it helps with answering the question of why the problem occurred in the first place. The process is essentially about digging beneath the surface of a problem and tracing it back to its origins. If you look closer to figure out the primary cause of the problem, you can fix the underlying processes so that it doesn’t happen again. This type of analysis is crucial for identifying the most effective solutions. It always comes down to three fundamental questions:
What’s the problem?
Why did it happen?
What can be done to prevent it from happening again?
When resolving incidents, you often need to get hold of the person (or customer) involved and it may be useful to specify the nature of the interaction, who made the contact and when. All corresponding fields can be found in this tab along with text areas for the root cause analysis and preventive measures.
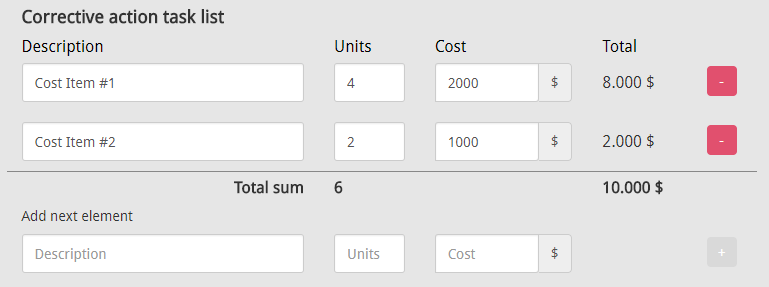
Corrective action task list
If it’s necessary to initiate actions following an incident, you can account for them under the Corrective action task list, and at the same time estimate the resulting costs – direct or indirect. A brief description of the cost items is registered, as well as the number of units and estimated cost of each item. For example, you can determine the hours of work spent on the resolution of an incident, enter the employee’s hourly wage, and the system will calculate the estimated cost. If there are any more cost items, you can add them by clicking the plus button on the right-hand side, and the system computes the total sum.
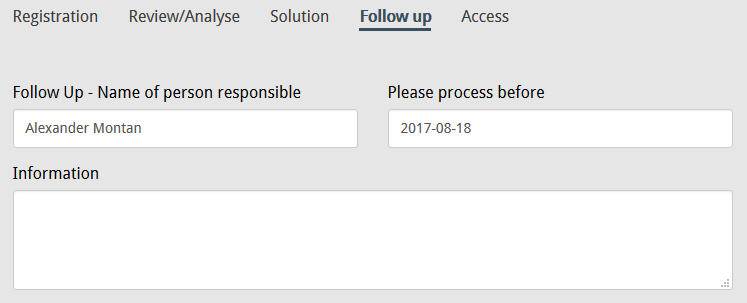
Follow-up
As previously mentioned, the individual tasked with the follow-up of an incident is only appointed if necessary, in the Review / Analysis tab. When the resolution of the incident is completed and the results of the root cause analysis have been disclosed, it’s the responsibility of the person selected to oversee the follow-up to further investigate and analyze the incident. In order to finish the follow-up and thereby bring the incident’s procedure to a conclusion, you click Confirm. It’s recommended to re-examine all the steps that were implemented, and if the incident has been processed satisfactorily, you can close it by clicking the corresponding button under Actions.
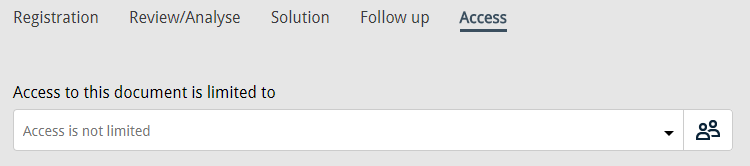
Access
The Access tab gives you the possibility of restricting access to the incident in question. Under the tab, there’s only a drop-down list to be found, containing the names of the company’s employees. From this list, you can select the individuals that should have access to the incident. There’s also the option of clicking the ![]() icon, which opens the address book. Consequently, only the selected individuals have access to the incident. If nobody is selected, everybody has access to the document.
icon, which opens the address book. Consequently, only the selected individuals have access to the incident. If nobody is selected, everybody has access to the document.
Web submissions
Clients and other outsiders can submit incidents and complaints online. Such incidents must be reviewed and approved before they are formally registered in the system and their processing starts. The reason is the possibility of irrelevant and unwanted submissions or spam. The Simple (web) form for online incidents is designed in the Settings of the system, where it’s decided how elaborately the incidents should be categorized. This will be covered in more detail in chapter 4.1.5.
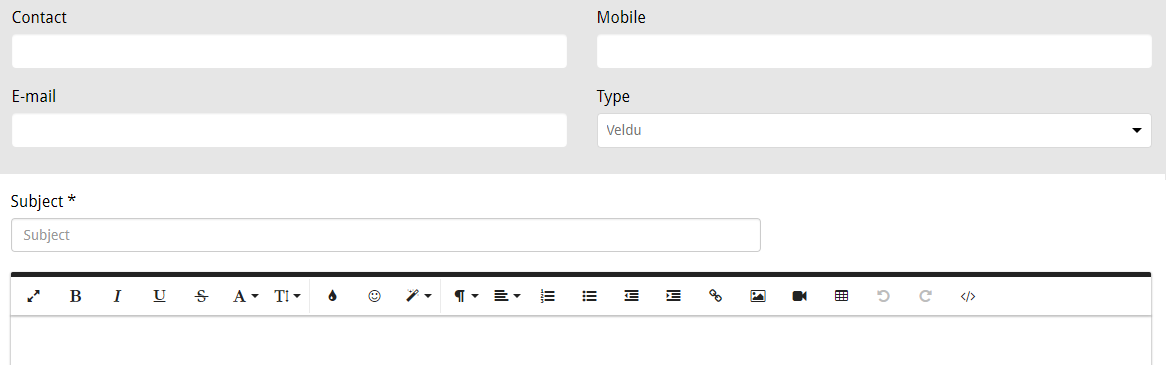
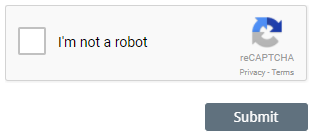
When it comes to filling out the web form, there usually are fields where you can enter your personal information – at least your name, phone number and email address. It’s recommended to submit complaints under your own name as it may facilitate their processing. However, it’s also possible to enter submissions anonymously, as it’s not required to fill out any fields except the Subject of the incident. Obviously, the text editor is used to convey the message in detail, and attachments can be uploaded to emphasize certain factors. Before the incident is finally confirmed and submitted for subsequent validation, you must indicate that you are not a robot but a human being, by checking the reCAPTCHA box.
Deleting incidents
It’s possible to delete an incident from the system, provided that the access to it hasn’t been restricted. An incident can be deleted by clicking the waste bin icon ![]() on the right-hand side of it in the incident list. On the other hand, if you want to delete several incidents at the same time, you can mark their checkboxes, click Actions and Delete them there.
on the right-hand side of it in the incident list. On the other hand, if you want to delete several incidents at the same time, you can mark their checkboxes, click Actions and Delete them there.
If you accidentally delete an incident, there’s no need to panic as deleted incidents get sent to the Recycle bin, where you can restore them. The incident will then be accessible again in its original location and available for editing. You can access the Recycle bin simply by clicking the corresponding option under your username on the CCQ banner up top. If you’re absolutely positive you won’t be needing the deleted incident ever again, you can permanently delete it from the system. After that, it’s gone forever. As a rule of thumb, you should avoid permanently deleting incidents without very good reason. There’s a chance you could exploit the resolution strategy of old incidents, if similar ones should arise.
