
System Settings and Configuration
Contents
Settings
Document type
Manual
TOC – Process
Company settings
Default value
Approval process
Standards
Laws & regulations
Templates
User templates
Mail groups
CCQ offers administrators a comprehensive range of configuration options to set up the system according to their organization’s needs and preferences. The system provides tremendous flexibility by allowing users to customize several aspects that affect the way their company conducts quality control.
By clicking the settings ![]() icon on the CCQ banner up top, you will find the numerous configuration options of the Quality Manual. This is where you control the basic functionality of the system, manage users, create templates, organize standards and design different approval processes. This settings menu will only be visible to you if you’re an admin.
icon on the CCQ banner up top, you will find the numerous configuration options of the Quality Manual. This is where you control the basic functionality of the system, manage users, create templates, organize standards and design different approval processes. This settings menu will only be visible to you if you’re an admin.
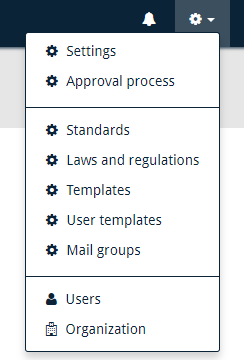
Settings
In Settings, you can define the various Document types you’ll be using throughout the system. You can set up the company’s Manuals and under the tab TOC – Processes you can register the myriad of different processes and procedures your organization has outlined. In Company settings you can upload the company logo that will appear on every published document, and restrict public access to documents.
Document type
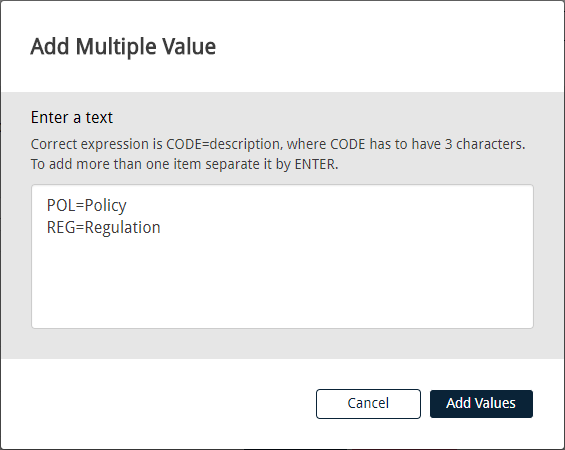
When you define a new document type, you need to enter a three-character code and a short description of the document type. For example, if the document concerns company policy, the three-character code could be ‘POL’ and the description ‘Policy.’
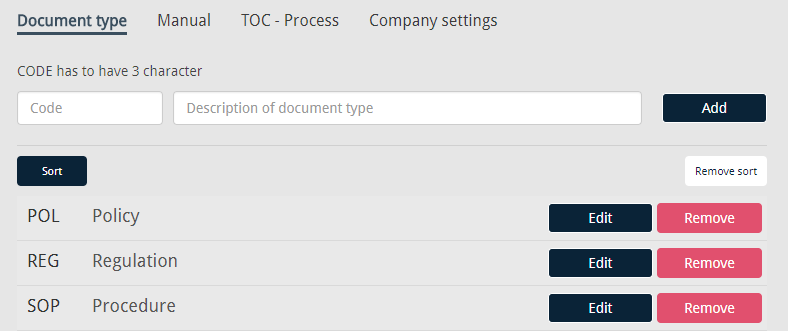
Under Actions, you have an option called Add multiple values. This feature can be convenient to use when the intention is to create multiple document types at a time. A dialog window appears, where you enter text of the form code=description for each document type, separated by a newline.
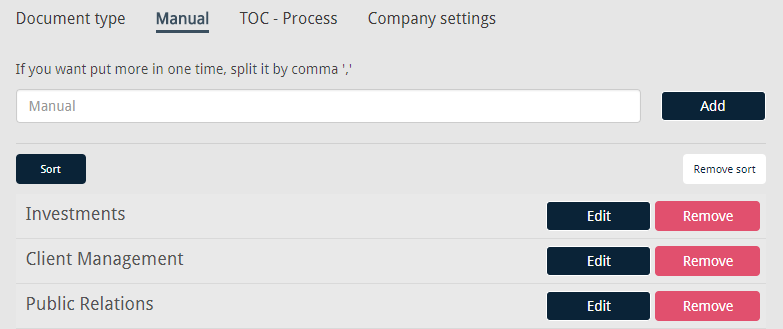
Manual
Here you determine the names of your manuals. You simply type the title in the textbox and click Add. If you want to add more than one title at a time, you should separate the values with a comma. You can either sort your list manually by “dragging and dropping”, or sort it alphabetically by clicking Sort.
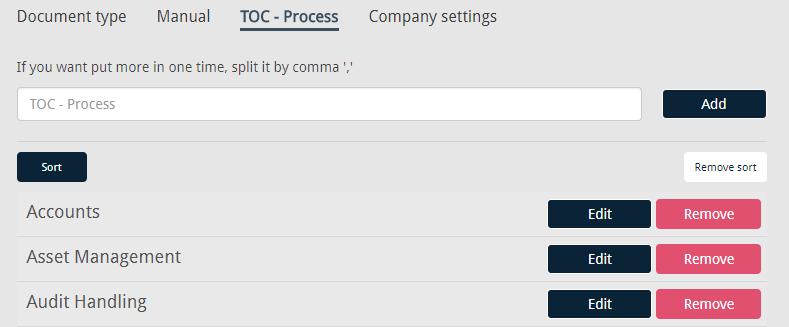
TOC – Process
This is where you register all the different processes for your company. As with the manuals above, the same rules apply when adding the names of your processes. Either one at a time, or several. As before, when sorting you can either “drag and drop” or click Sort.
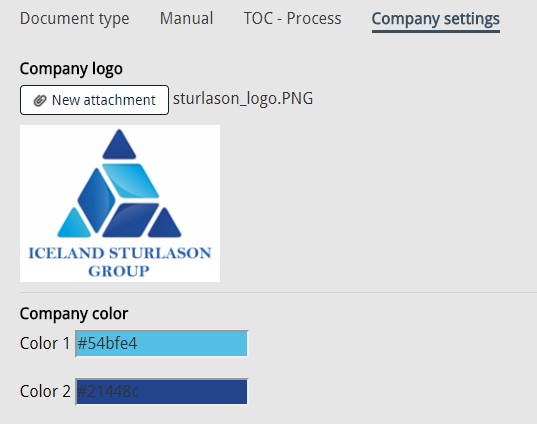
Company settings
In this section, you can upload the company logo that will appear on each and every published document. You can also determine the “company colors”, i.e. the color of the lines that appear beneath the title of published documents.
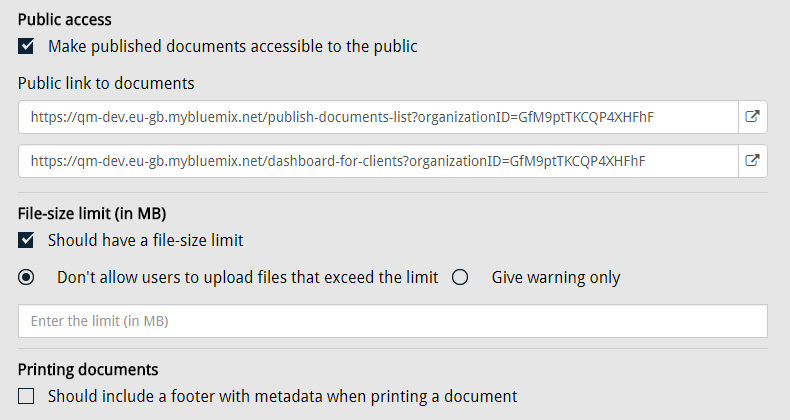
In addition, you have some settings where you can limit file-sizes, format the printing of documents, and control access to published documents. It’s possible to grant customers or other outsiders the permission to view published documents via certain ‘public links.’ Only selected documents that have not been marked “invisible to public access lists” will appear in these public links.
Default values
Under Actions, you have an option called Insert default value. When you apply this action, predefined configuration values for different document types, manuals and processes are inserted into the system settings. The aim is to give first-time users an idea of what kinds of values can be expected when classifying different documents. For the time being, the default values are unfortunately all in Icelandic, so this feature is probably not applicable for all users.
Please note that these default values are by no means set in stone, as they are only meant to give an example of how the system can be configured. They should be altered to better suit your company’s needs.
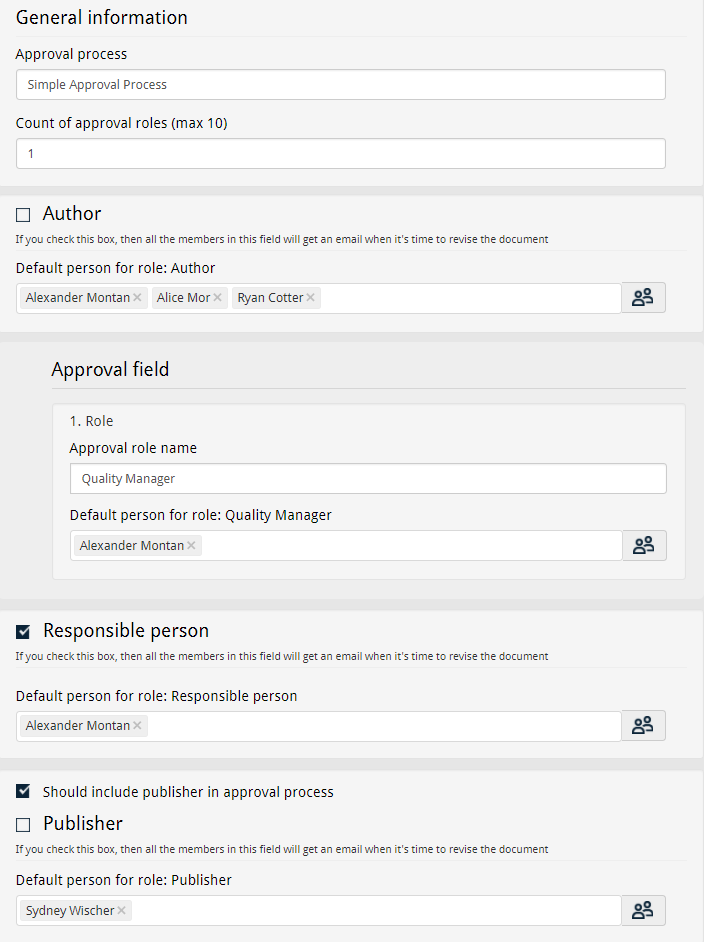
Approval process
You have the freedom to define as many approval processes as you’d like. It’s only standard to have a range of different approval processes to choose from, when working with different kinds of documents. Each approval process is adjusted to its purpose, depending on what roles are going to be involved. It’s possible to utilize up to 10 different roles.
Every approval process includes an Author, a Responsible person and, if requested, a Publisher. For each of the aforementioned roles, you have a checkbox where you can decide whether said person should receive an email notification when the document is up for review.
Standards
This is where you add references to relevant standards, such as the popular ISO standards for quality management. The list of references that you create here will be accessible when you create a new document, filed under References to requirements. This is essential to the classification of the document, and allows you to label it appropriately.
To facilitate the process of listing all standards that concern your company, CCQ sports a nifty little feature that inserts into the system common families of standards. At the time of writing, there are three families you can choose from:
- The ISO 9001:2015 family that addresses various aspects of quality management.
- The ISO 27001:2005 which provides requirements for an information security management system.
- The ISO 14001:2004 which provides tools for companies looking to manage their environmental responsibilities.
When you’re adding a new standard, you simply click Actions and select the appropriate Insert default value. The corresponding standards and their definitions get imported into the field for Reference to standards and subsequently become available for you to reference, as was covered in chapter 3.2. This conveniently saves you the trouble of typing in every standard that is of importance to your organization.

Laws & regulations
This is where you add references to all relevant laws and regulations that your organization must adhere to, other than the standards mentioned above. Examples include general legislation concerning accounting and financial statements, and data privacy regulations such as the GDPR. In fact, a GDPR content package is included in the Quality Manual module that’s accessible here under Actions. As with the standards above, the list of references that you create here will be accessible when you create a new document, filed under References to requirements.
Templates
CCQ presents you with the ability to create templates for documents in order to potentially facilitate the process of making new documents. This should reduce paperwork as well as establish consistency between documents. To fetch a predetermined template for a document, you click the icon in the text editor, as was covered in chapter 3.5.1.
User templates
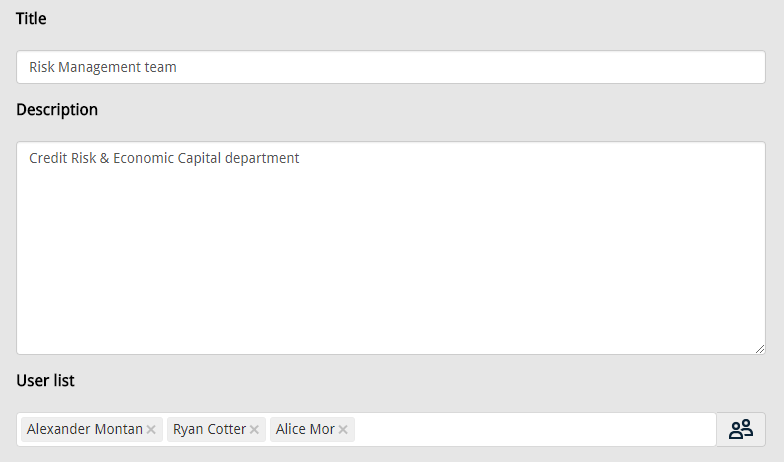
Within an organization you usually have a wide assortment of employees. You have administrators, executives, project managers, analysts, consultants, etc. CCQ offers administrators the ability to create different user templates or roles, and assign them to general users of the system. In a typical user template, you need to specify all the details that are required when you’re creating a new user. The process of creating a new user will be further discussed in chapter 8.2.
In the template, you determine users’ permissions, their default language and dashboard settings. Bear in mind that you’re creating a template for a group of employees, but more often than not you need to make some additional adjustments for individual employees. This should speed up the process when you’re creating new users.
Mail groups
This is where you define different groups of people that you want to send an email to, simultaneously. It can be extremely convenient to create different mail groups, in order to avoid adding each name each time you want to send them an email. For example, when creating a new document you can add a mail group to the list of persons that will receive a notification when the document is published.